

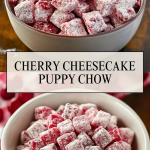
Cherry Cheesecake Puppy Chow is a delightful twist on the classic snack mix, turning it into a dessert-inspired treat that’s impossible to resist. With its creamy, tangy cheesecake flavor and a burst of cherry sweetness, each bite is crunchy, sugary, and satisfyingly nostalgic. It’s a no-bake indulgence that’s perfect for sharing at parties, gifting during the holidays, or simply enjoying by the handful on a cozy night in.


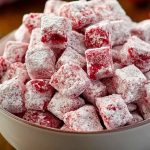
This version of puppy chow—also known as muddy buddies—uses cherry gelatin or freeze-dried cherries to give it that vibrant pink hue and fruity punch. White chocolate and cream cheese flavors bind everything together, and a final dusting of powdered sugar creates the classic coating. The best part? It only takes about 15 minutes to whip up a big batch!
Ingredients for Cherry Cheesecake Puppy Chow
- 6 cups Rice Chex cereal
- 1 cup white chocolate chips
- 1/4 cup cream cheese (softened)
- 1 tablespoon butter
- 1/4 cup cherry gelatin mix or 1/4 cup freeze-dried cherry powder
- 1 teaspoon vanilla extract
- 1 1/2 cups powdered sugar
- 1/2 cup dried cherries (optional for garnish and texture)

Step-by-Step Instructions for Cherry Cheesecake Puppy Chow
Step 1: Prepare the Coating
In a microwave-safe bowl, combine the white chocolate chips, softened cream cheese, and butter. Microwave in 30-second increments, stirring between each, until the mixture is smooth and fully melted. Stir in the vanilla extract and cherry gelatin mix (or freeze-dried cherry powder) until evenly blended. The mixture should be creamy and pink.
Step 2: Mix with Cereal
Place the Rice Chex cereal into a large mixing bowl. Pour the cherry cheesecake mixture over the cereal. Use a spatula to gently fold and toss the cereal until all pieces are evenly coated. Work carefully to avoid crushing the cereal.
Step 3: Add the Powdered Sugar
Transfer the coated cereal into a large zip-top bag or a sealable container with a lid. Add the powdered sugar, seal the bag or container, and shake vigorously until all cereal pieces are thoroughly coated and no longer sticky.
Step 4: Add Finishing Touches
Spread the puppy chow out onto a baking sheet lined with parchment paper to cool and dry completely. Once cooled, toss in the dried cherries if using. They’ll add a chewy contrast and a pop of tartness.
Step 5: Store or Serve
Serve your Cherry Cheesecake Puppy Chow in a large bowl for snacking or divide it into small gift bags for sharing. It’s ready to enjoy immediately!
Storage Instructions
Cherry Cheesecake Puppy Chow should be stored in an airtight container at room temperature for up to 1 week. If you prefer a firmer texture or live in a warmer climate, you can store it in the refrigerator, where it will stay fresh for up to 2 weeks. For long-term storage, freeze it in a sealed bag for up to 2 months, allowing it to come to room temperature before serving.
To avoid sogginess, ensure the mix is completely dry before sealing and storing. Avoid exposure to moisture or heat, as this can melt the coating and reduce crunchiness.
Estimated Nutrition
(Per 1/2 cup serving – approximate values)
- Calories: 210
- Total Fat: 8g
- Saturated Fat: 4.5g
- Cholesterol: 10mg
- Sodium: 85mg
- Total Carbohydrates: 33g
- Sugars: 20g
- Protein: 1g
Note: Nutrition may vary based on specific brands and exact ingredient quantities used.
Frequently Asked Questions
1. Can I make this recipe dairy-free?
Yes! Substitute the white chocolate with dairy-free chips and use a plant-based cream cheese and butter alternative.
2. What if I don’t have cherry gelatin or freeze-dried cherries?
You can use cherry extract and a few drops of red food coloring for the flavor and color. It won’t be exactly the same, but still tasty.
3. Can I use other cereals besides Rice Chex?
Absolutely. Corn Chex, Crispix, or any similar square-shaped cereal will work just as well.
4. How do I prevent the puppy chow from getting soggy?
Make sure the coated cereal is completely dry before storing. Spreading it out to cool helps avoid moisture retention.
5. Is this recipe safe for kids to make?
Yes, with supervision! The microwave step requires care, but the mixing and shaking are fun and easy for children to help with.
6. Can I double the recipe?
Yes. Just ensure your mixing and shaking containers are large enough, or work in batches for even coating.
7. Is this the same as muddy buddies?
Yes, “puppy chow” and “muddy buddies” are different names for the same type of snack, though this version uses unique cheesecake and cherry flavors.
8. Can I use fresh cherries?
Fresh cherries are not ideal due to their moisture content, which can make the mix soggy. Stick with dried or freeze-dried cherries.
Cherry Cheesecake Puppy Chow
- Total Time: 0 hours
- Yield: About 7 cups
Description
Cherry Cheesecake Puppy Chow is a fun, fruity take on a classic no-bake snack. Bursting with cherry flavor and creamy cheesecake richness, it’s coated in a sweet powdered sugar shell that makes it delightfully irresistible. Perfect for holidays, parties, or anytime munching.
Ingredients
6 cups Rice Chex cereal
1 cup white chocolate chips
1/4 cup cream cheese (softened)
1 tablespoon butter
1/4 cup cherry gelatin mix or 1/4 cup freeze-dried cherry powder
1 teaspoon vanilla extract
1 1/2 cups powdered sugar
1/2 cup dried cherries (optional)
Instructions
- In a microwave-safe bowl, melt white chocolate chips, cream cheese, and butter in 30-second intervals until smooth.
- Stir in vanilla extract and cherry gelatin or cherry powder.
- Place Rice Chex in a large mixing bowl.
- Pour the cherry cheesecake mixture over the cereal and gently fold to coat evenly.
- Transfer to a large zip-top bag or sealed container. Add powdered sugar.
- Shake until all pieces are coated and no longer sticky.
- Spread on parchment paper to cool completely.
- Mix in dried cherries if using. Store or serve as desired.
- Prep Time: 15 minutes
- Cook Time: None
- Category: Dessert
