


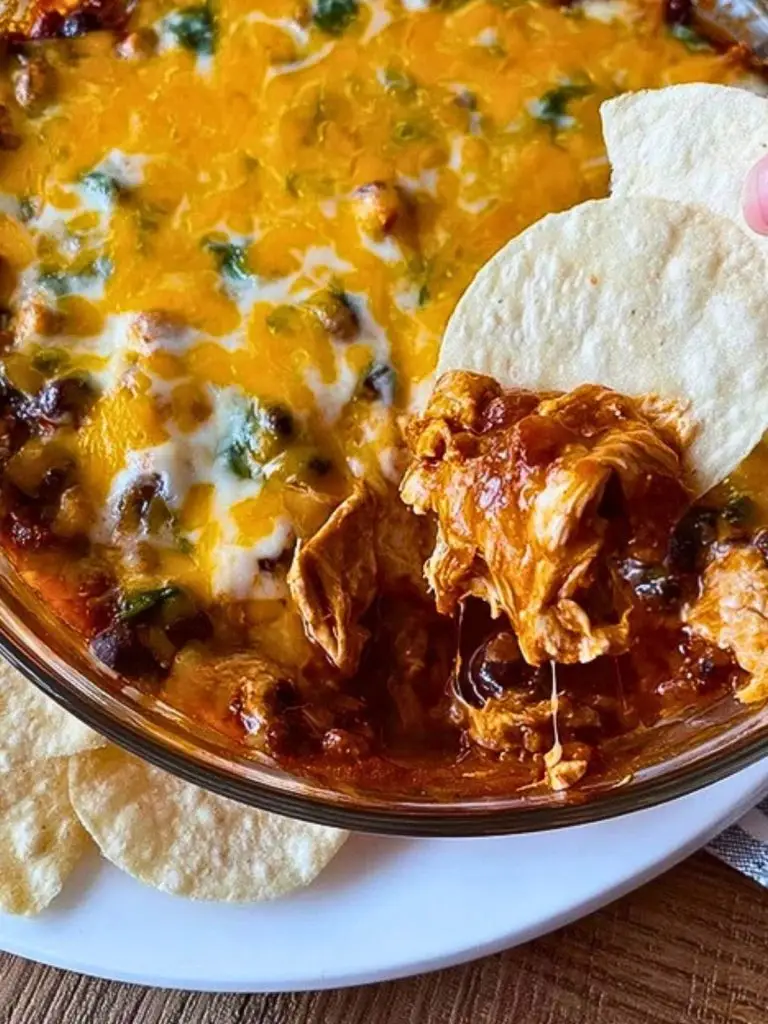
When the craving hits for something gooey, cheesy, and bold, nothing hits the spot quite like this Easy Hot Cream Cheese Chili Dip. It’s that perfect blend of melty cheddar, hearty chili, and creamy richness that makes every bite scoop-worthy. Whether you’re throwing together a game day snack or need a crowd-pleaser for your next potluck, this dip is ridiculously simple to make but totally irresistible.
It starts with a base of smooth cream cheese and layers in bold flavors from canned chili and black beans, topped off with a generous layer of melted cheese. Just pop it in the oven until it bubbles and serve it up with tortilla chips. It’s cozy, craveable, and completely customizable depending on your heat preference or what you have in your pantry.
Can I Use Any Kind of Chili for This Dip?
Absolutely. This recipe is flexible enough to work with whatever canned chili you love—with or without beans. You can use a beefy chili, turkey chili, or even a vegetarian version. Want to use your homemade leftover chili? Even better. Just make sure it’s thick enough to hold up to dipping.

Ingredients for the Easy Hot Cream Cheese Chili Dip
Cream Cheese: This is the creamy foundation of your dip. It melts into a velvety layer that pairs perfectly with the heartier chili.
Canned Chili: Adds bold, savory flavor and a little heat. Choose your favorite kind, whether it’s meaty or meat-free.
Black Beans: These bring a little extra texture and protein, helping to bulk up the dip and make it heartier.
Shredded Cheddar Cheese: For that classic gooey, melty cheese pull. A mix of sharp and mild cheddar works great.
Green Onions (optional): Adds a pop of freshness and color to finish off the dip.
Tortilla Chips: Your perfect vehicle for scooping up every last cheesy bite.
How To Make the Easy Hot Cream Cheese Chili Dip
Step 1: Preheat and Prep
Start by preheating your oven to 375°F (190°C). Lightly grease a small baking dish or use a pie dish for easy scooping later. This ensures the dip won’t stick and makes for quick cleanup.
Step 2: Layer the Cream Cheese
Spread a full block of softened cream cheese evenly over the bottom of the baking dish. You can let it sit out for 10–15 minutes beforehand to make it easier to spread.
Step 3: Add the Chili and Beans
Spoon your favorite canned chili over the cream cheese layer. If you’re using black beans, mix them into the chili before spreading. Smooth it all out with a spatula for an even layer.
Step 4: Top with Cheese
Sprinkle shredded cheddar cheese generously over the chili. Make sure every inch is covered with cheesy goodness.
Step 5: Bake Until Bubbly
Place the dish in the oven and bake for 20–25 minutes, or until the cheese is melted and bubbly. If you want a little browning on top, you can broil it for 2 minutes at the end—just keep an eye on it!
Step 6: Garnish and Serve
Remove from the oven, top with sliced green onions if using, and serve hot with tortilla chips. Dig in immediately while it’s warm and gooey!
How to Serve and Store This Easy Hot Cream Cheese Chili Dip
This dip is best served piping hot straight out of the oven. Pair it with sturdy tortilla chips, pita chips, or even slices of toasted baguette for scooping. It also works great as a topping for baked potatoes or inside a toasted tortilla for a cheesy chili wrap.
Hosting a party? Keep it warm by transferring it to a small slow cooker set to “warm.” It’ll stay gooey and perfect for grazing.
If you have leftovers (lucky you!), simply cover the dish tightly and refrigerate for up to 3 days. To reheat, pop it in the microwave in 30-second intervals until hot, or warm it in a 350°F oven until bubbly again.
Frequently Asked Questions
Can I make this ahead of time?
Yes! Assemble the dip up to a day in advance and refrigerate it, covered. When you’re ready to serve, just bake it as instructed—add 5 extra minutes to the baking time if going straight from the fridge.
Can I freeze it?
Technically yes, but it’s best fresh. The texture of cream cheese can change once frozen and thawed. If you do freeze it, reheat gently and give it a good stir before serving.
What other cheese can I use?
Feel free to mix things up! Monterey Jack, pepper jack, mozzarella, or a Mexican cheese blend all melt beautifully.
How spicy is it?
It really depends on the chili you use. Want more heat? Add chopped jalapeños or a few dashes of hot sauce to the chili layer.
Can I use homemade chili?
Absolutely—it’s a great way to use up leftovers. Just make sure it’s thick and not too soupy.
What can I serve with this besides chips?
Try using bell pepper strips, celery sticks, crackers, or even mini naan rounds for a fun twist on classic dippers.
Want More Dip Ideas?
If this Easy Hot Cream Cheese Chili Dip made your snack table a hit, you’ll love these other warm, cheesy, and flavor-packed dips from Life with Jam:
- Try the Green Olive and Feta Cheese Dip for a salty, briny twist.
- Craving seafood? This Spicy Sailor’s Dip packs a creamy punch.
- For a comforting, hearty classic, the Cheese Dip That Will Make You Famous lives up to its name.
- The Cranberry Sauce Meatballs offer a sweet and savory party option.
- Looking for something herby and fresh? The Louisiana Remoulade Sauce is zesty and so versatile.
Save This Pin + Share Your Results
📌 Save this recipe to your Pinterest appetizer board so you always have it ready for your next gathering.
Let me know in the comments how yours turned out. Did you go with classic cheddar or spice it up with pepper jack? Add green chiles or hot sauce?
I love seeing your twists on these recipes. Got a tip or variation? Share it and help others level up their dip game.
Find more easy, cozy, and craveable dishes over on my Pinterest: Life with Jam


Easy Hot Cream Cheese Chili Dip
- Total Time: 45 minutes
- Yield: 20 truffles
- Diet: Vegetarian
Description
These No Bake Caramel Crunch Butterfinger Truffles are the ultimate indulgent treat—featuring a soft caramel center, a crunchy Butterfinger coating, and a rich chocolate shell. Perfect for gifting, parties, or a sweet snack from the fridge.
Ingredients
12 fun-size Butterfinger candy bars
20 soft caramels (like Werther’s or Kraft)
2 tablespoons heavy cream
1 cup semi-sweet chocolate chips (or melting wafers)
1⁄4 cup crushed graham crackers or cookies (optional, for garnish)
Instructions
1. Place the Butterfinger bars in a sealed plastic bag and crush with a rolling pin into small and fine bits.
2. In a microwave-safe bowl, combine the soft caramels and heavy cream. Microwave in 30-second intervals, stirring each time, until smooth and melted.
3. Scoop teaspoons of melted caramel onto a parchment-lined tray. Freeze for 10–15 minutes until firm.
4. Take each caramel mound and coat in crushed Butterfinger crumbs. Form into a ball with your hands. Return to freezer for 10 more minutes.
5. Melt the chocolate in a microwave-safe bowl, stirring until smooth. Dip each truffle using a fork, tapping off the excess chocolate.
6. Place dipped truffles on parchment and sprinkle with additional Butterfinger or crushed cookies if desired.
7. Chill in the fridge for 15 minutes until set. Serve slightly chilled.
Notes
For easier dipping, keep truffles chilled until right before coating in chocolate.
You can substitute the Butterfinger crumbs with toffee bits or peanut-free crunchy candy if needed.
Add a pinch of sea salt to the caramel before freezing for a salted caramel twist.
- Prep Time: 20 minutes
- Cook Time: 25 minutes
- Category: Dessert
- Method: No Bake
- Cuisine: American
Nutrition
- Serving Size: 1 truffle
- Calories: 145
- Sugar: 14g
- Sodium: 65mg
- Fat: 8g
- Saturated Fat: 4.5g
- Unsaturated Fat: 3g
- Trans Fat: 0g
- Carbohydrates: 18g
- Fiber: 0.5g
- Protein: 1g
- Cholesterol: 5mg