
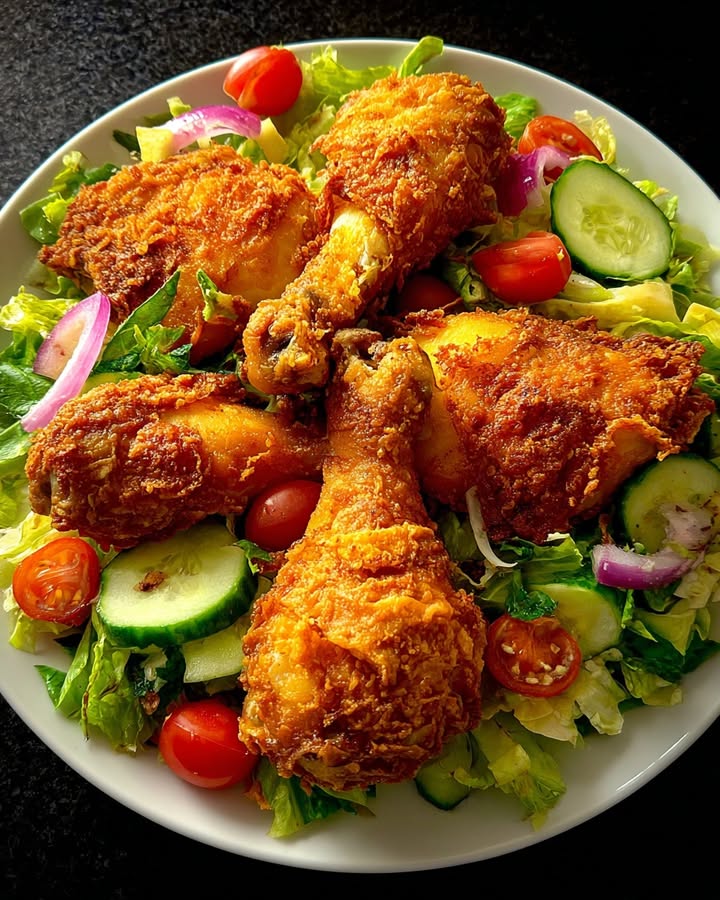
Crispy fried chicken over fresh greens is my go-to meal when I want something that feels indulgent but still balanced.
It’s the kind of dish that disappears fast at my table, even though it takes less than an hour from start to finish.
The golden, crunchy coating on juicy chicken paired with cool, crisp vegetables and bright flavors is honestly hard to beat.
I’ve tried versions at restaurants, but nothing compares to homemade where you control the seasoning and the oil temperature.
Why You Will Love This Crispy Fried Chicken Salad Plate
Ingredients
- 4 chicken drumsticks
- 4 chicken thighs
- 2 cups all-purpose flour
- 1 tsp paprika
- 1 tsp garlic powder
- 1 tsp onion powder
- 1 tsp salt
- 1 tsp black pepper
- 2 eggs
- 1 cup buttermilk
- Vegetable oil for frying
- 4 cups chopped lettuce
- 1 cucumber, sliced
- 1 cup cherry tomatoes
- 1/2 red onion, sliced
Step 1: Prepare Your Seasoning Mix
- 2 cups all-purpose flour
- 1 tsp paprika
- 1 tsp garlic powder
- 1 tsp onion powder
- 1 tsp salt
- 1 tsp black pepper
I like to combine all my dry ingredients in a shallow bowl or dish before I start working with the chicken. This way everything is mixed evenly and I’m not scrambling when it’s time to coat the pieces. The spices distribute much better when combined ahead of time rather than trying to mix them while coating wet chicken.
Step 2: Mix Your Wet Coating
- 1 cup buttermilk
- 2 eggs
In a separate bowl, I whisk together the buttermilk and eggs until they’re fully combined. The buttermilk is key here because its slight acidity tenderizes the chicken while it creates a thicker coating that adheres better to the flour mixture.
I find that a fork works perfectly for this, and I make sure there are no egg white streaks remaining.
Step 3: Coat the Chicken
- 4 chicken drumsticks
- 4 chicken thighs
Working with one piece at a time, I dip each drumstick and thigh into the buttermilk mixture, letting excess drip off into the bowl.
Then I roll it in the seasoned flour, making sure all sides are completely covered. I tend to press the flour coating gently onto the chicken so it adheres well rather than just lightly dusting it.
Once coated, I place each piece on a clean plate or paper towel. I let them sit for about 5 minutes so the coating can set slightly before frying.
Step 4: Heat Your Oil and Fry the Chicken
- Vegetable oil for frying
I heat enough vegetable oil in a large, heavy-bottomed skillet or Dutch oven to reach a depth of about 2 inches. The temperature should be around 350°F if you have a thermometer.
If you don’t have a thermometer, I drop a small piece of the flour mixture into the oil. When it sizzles immediately and turns golden within a few seconds, the oil is ready.
Working in batches so I don’t overcrowd the pan, I carefully place the coated chicken pieces into the hot oil.
I fry each batch for about 12 to 15 minutes, turning halfway through, until the coating is deeply golden brown and the internal temperature reaches 165°F. The chicken should sound crispy when you tap it with a spoon.
Once done, I transfer the pieces to a plate lined with paper towels to drain any excess oil.
Step 5: Build Your Fresh Salad Base
- 4 cups chopped lettuce
- 1 cucumber, sliced
- 1 cup cherry tomatoes
- 1/2 red onion, sliced
I arrange the chopped lettuce on a large plate or platter as my base.
Then I arrange the cucumber slices, cherry tomatoes, and red onion slices around the lettuce in an appealing pattern. I like to scatter them so every bite includes a mix of vegetables.
Step 6: Top and Serve
While the chicken is still warm, I arrange the crispy pieces over the salad bed.
The warmth of the chicken against the cool, fresh greens is exactly what makes this dish work so well. I serve it immediately while the coating is still at its crispiest.
You can drizzle your favorite dressing over the whole thing, or serve the dressing on the side for people to add as much as they like.

Storage Instructions
Store: Keep leftover fried chicken in an airtight container in the refrigerator for up to 3 days. Store the salad components separately in the crisper drawer to maintain freshness. You can assemble and eat cold, though the coating won’t be as crispy as fresh.
Freeze: I don’t recommend freezing the fried chicken as it affects the texture significantly. However, you can freeze the uncooked, coated chicken pieces for up to 2 months. Fry them directly from frozen, adding a few extra minutes to the cooking time.
Reheat: The best way to recrisp the chicken is in a 375°F oven for about 8 to 10 minutes. I avoid the microwave as it makes the coating soggy. If you must use a microwave, do it for very short bursts and accept that crispiness will be lost.
What to Serve With This Crispy Fried Chicken Salad Plate
- A crispy roll or cornbread on the side for soaking up any dressing
- Your favorite salad dressing such as ranch, honey mustard, or a simple vinaigrette
- A cold beverage like iced tea or lemonade to balance the richness of the fried chicken
- Fresh lemon or lime wedges for a bright squeeze of citrus
Estimated Nutrition
- Calories: 580
- Protein: 48g
- Fat: 28g
- Carbohydrates: 38g
(Estimated per serving, without optional ingredients or dressing)
Crispy Fried Chicken Salad Plate
Ingredients
Method
- Combine the 2 cups all-purpose flour, paprika, garlic powder, onion powder, salt, and black pepper in a shallow bowl. Mix well so all spices are evenly distributed throughout the flour.
- In a separate bowl, whisk together the buttermilk and eggs until fully combined with no egg white streaks remaining.
- Working with one piece at a time, dip each drumstick and thigh into the buttermilk mixture, letting excess drip off. Roll in the seasoned flour, pressing gently so coating adheres well. Place on a clean plate and let sit for 5 minutes.
- Heat vegetable oil in a large skillet to a depth of about 2 inches, reaching approximately 350°F. Working in batches, carefully place coated chicken into the hot oil. Fry for 12 to 15 minutes, turning halfway through, until deeply golden and internal temperature reaches 165°F. Transfer to a paper towel-lined plate to drain.
- Arrange 4 cups chopped lettuce on a large plate or platter. Scatter cucumber slices, cherry tomatoes, and red onion slices around the lettuce in an appealing pattern.
- While the chicken is still warm, arrange the crispy pieces over the salad. Serve immediately while the coating is at its crispiest. Drizzle with your favorite dressing or serve dressing on the side.
