
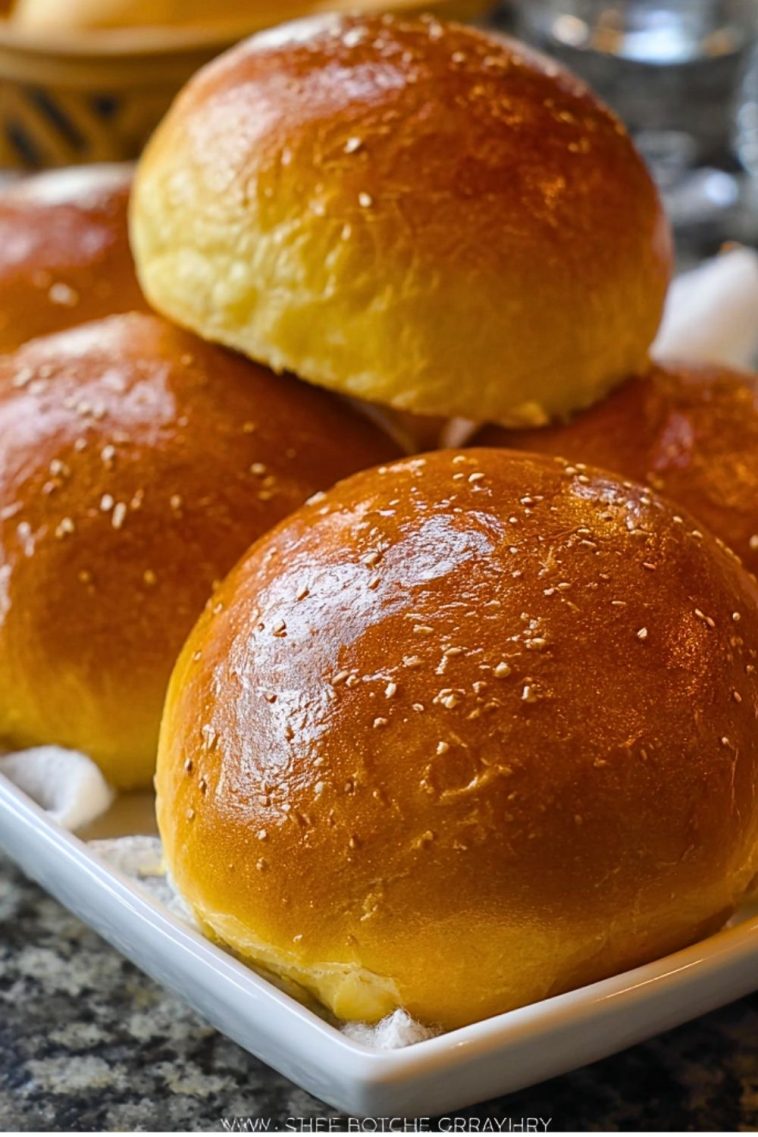
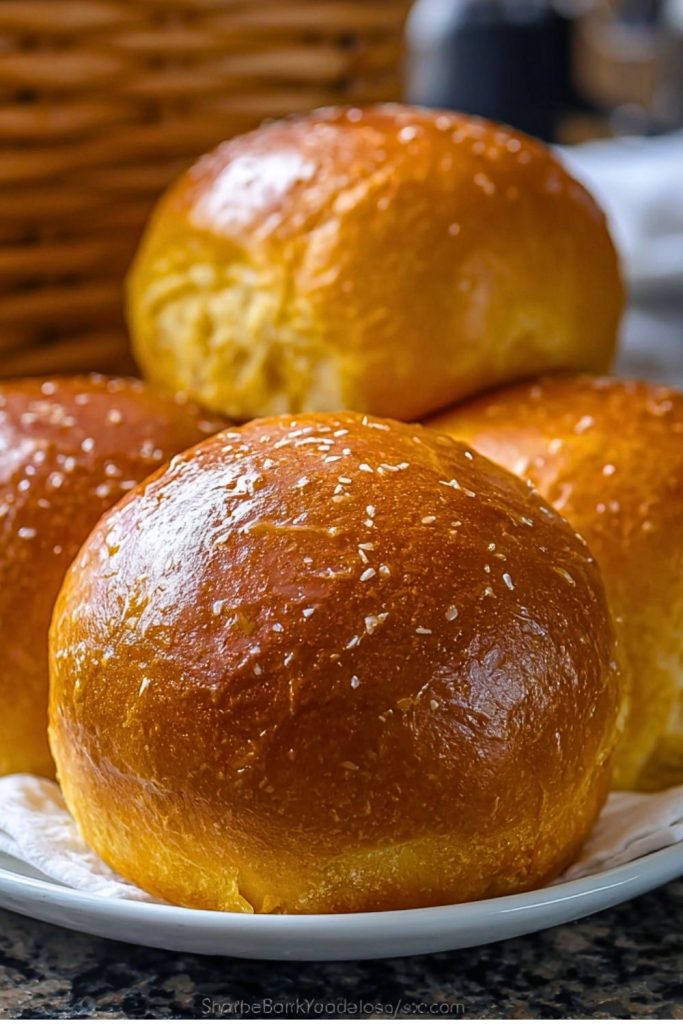
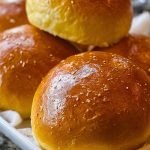
Golden, fluffy, and gently sweet—brioche buns are the kind of bread that make even a simple sandwich feel gourmet. These pillowy buns have a soft crumb and a rich, buttery flavor that comes from a dough enriched with eggs and milk. Whether you’re building the ultimate burger, crafting a breakfast sandwich, or just enjoying one warm with a pat of butter, these brioche buns add the perfect touch of indulgence.

What sets brioche apart is its balance: light yet rich, tender yet structured. They have enough integrity to hold up to juicy fillings but are soft enough to tear into with ease. Once you bake a batch of these at home, you’ll find store-bought buns just can’t compare.
What Kind of Flour Should I Use for Brioche Buns?
For the ideal brioche texture, use bread flour. Bread flour has a higher protein content than all-purpose flour, which helps the dough develop the strong gluten network needed to trap the air from fermentation. This creates a chewy, structured bun with a soft interior. If you only have all-purpose flour, it will still work—the buns may be slightly less chewy but just as delicious.
Ingredients for the Brioche Buns
Bread Flour – Provides structure and elasticity to hold the rise and create that signature chewy texture.
Whole Milk – Adds moisture and richness; warm it slightly to help activate the yeast.
Granulated Sugar – Feeds the yeast and adds just the right amount of sweetness to the dough.
Active Dry Yeast – Helps the buns rise beautifully; be sure to let it bloom in warm milk.
Large Eggs – Enrich the dough with fat, improving the crumb and deepening the color.
Unsalted Butter – Softened and added gradually, butter gives brioche its signature richness and tender texture.
Salt – Enhances flavor and balances sweetness.
Egg Wash (1 egg + 1 tbsp water) – For that glossy, golden finish.
Sesame Seeds (optional) – Sprinkle on top for added texture and flavor.

How To Make the Brioche Buns
Step 1: Activate the Yeast
Warm the milk until it’s just slightly warm to the touch (about 110°F/43°C). Stir in the sugar and sprinkle the active dry yeast over the top. Let it sit for 5-10 minutes until foamy. This means the yeast is active and ready to go.
Step 2: Make the Dough
In the bowl of a stand mixer fitted with a dough hook, combine the flour and salt. Add the yeast mixture and eggs. Mix on low speed until the dough begins to form.
Step 3: Add the Butter
With the mixer running, add the softened butter a tablespoon at a time, letting each piece incorporate before adding the next. Continue mixing for 10-12 minutes, until the dough is glossy and elastic and pulls away from the bowl.
Step 4: First Rise
Transfer the dough to a greased bowl, cover with plastic wrap or a damp towel, and let it rise in a warm place for 1 to 1.5 hours, or until doubled in size.
Step 5: Shape the Buns
Punch down the dough and turn it out onto a floured surface. Divide into 8 equal pieces and shape each into a smooth ball. Place the dough balls onto a baking sheet lined with parchment paper, spacing them out evenly.
Step 6: Second Rise
Cover the tray loosely with plastic wrap or a towel and let the buns rise again for about 45 minutes, until puffy.
Step 7: Egg Wash and Bake
Preheat the oven to 375°F (190°C). Brush each bun with egg wash and sprinkle sesame seeds on top if desired. Bake for 16-18 minutes or until the tops are deeply golden brown.
Step 8: Cool and Enjoy
Remove the buns from the oven and let them cool on a wire rack. Serve warm or let them cool completely before slicing.
Serving and Storing Brioche Buns
Brioche buns are best enjoyed fresh and slightly warm—just out of the oven or gently reheated. Serve them with burgers, pulled pork, chicken sandwiches, or even breakfast fillings like eggs and bacon. They’re also excellent split and toasted with a pat of butter or fruit preserves.
To store, let the buns cool completely, then keep them in an airtight container at room temperature for up to 3 days. For longer storage, freeze the buns in a sealed bag for up to 2 months. Reheat in the oven at 300°F (150°C) until warmed through.
Frequently Asked Questions
How do I know when the dough is kneaded enough?
The dough should be smooth, shiny, and elastic. It should pull away from the sides of the bowl and pass the “windowpane test”—a small piece can be stretched thin without tearing.
Can I make brioche dough by hand?
Yes, but it requires more time and effort. Knead vigorously after adding butter until the dough is smooth and elastic. Expect about 15-20 minutes of hand kneading.
What if my dough is too sticky?
It’s normal for brioche dough to be slightly sticky due to the butter and eggs. Resist the urge to add too much flour; instead, lightly flour your hands or work surface as needed.
Can I make the dough ahead of time?
Absolutely! After the first rise, refrigerate the dough overnight. This improves flavor and makes shaping easier the next day.
Why didn’t my buns rise properly?
Check that your yeast was active and the milk wasn’t too hot. Also ensure the dough had enough time and warmth to rise during both proofing stages.
Are these buns sweet or savory?
They lean slightly sweet due to the sugar, but they’re versatile enough to be used in both savory and sweet dishes.
Want More Bread Ideas?
If you’re a fan of these rich, fluffy brioche buns, you might love trying out these other savory and bakery-style recipes from the blog:
• Garlic Butter Steak Lightning Noodles for a comforting, flavor-packed meal.
• Parmesan and Spinach Cheese Twists as a crisp and cheesy snack or appetizer.
• Tender Beef Bao Buns if you’re curious about steamed, pillowy goodness with bold fillings.
• Garlic Parmesan Cheeseburger Bombs—all the burger flavors wrapped in a doughy shell.
• Mozzarella-Stuffed Soft Pretzels for a salty, gooey crowd-pleaser.
Save This Pin + Share Your Results
📌 Save this recipe to your Pinterest board so you can come back to it anytime you want freshly baked buns at home.
Have you baked these brioche buns yet? Let me know how yours turned out! Did you try different toppings or fillings? Maybe added cheese or swapped sesame for poppy seeds?
I always love hearing how others put their own spin on homemade bread. Drop your questions and results in the comments—let’s bake better together!

Brioche Buns
- Total Time: 0 hours
- Yield: 8 buns
Description
These brioche buns are soft, rich, and delicately sweet—perfect for burgers, breakfast sandwiches, or simply warm with butter. Made with eggs and butter, their tender texture and golden crust make them a bakery-worthy addition to any meal.
Ingredients
3 1/4 cups bread flour
3/4 cup whole milk, warm
3 tbsp granulated sugar
2 1/4 tsp active dry yeast
3 large eggs
1/2 cup unsalted butter, softened
1 tsp salt
1 egg + 1 tbsp water (for egg wash)
Sesame seeds (optional)
Instructions
- Activate the Yeast: Warm the milk and stir in sugar. Sprinkle yeast on top and let it sit for 5-10 minutes until foamy.
- Make the Dough: In a mixer bowl, combine flour and salt. Add yeast mixture and eggs. Mix until combined.
- Add the Butter: Gradually add butter while mixing. Knead for 10-12 minutes until the dough is shiny and elastic.
- First Rise: Transfer dough to a greased bowl, cover, and let rise for 1-1.5 hours until doubled.
- Shape the Buns: Punch down dough, divide into 8 portions, and shape into balls. Place on a lined baking sheet.
- Second Rise: Cover loosely and let rise 45 minutes until puffy.
- Bake: Preheat oven to 375°F (190°C). Brush buns with egg wash, sprinkle sesame seeds if using. Bake for 16-18 minutes until golden.
- Cool and Serve: Cool on a wire rack. Serve warm or store once fully cooled.
- Prep Time: 20 minutes (plus rising time)
- Cook Time: 16- 18 minutes
- Category: Breakfast